Adding a shed to your South Florida property? A slab-on-grade foundation is a durable, budget-friendly base, and with careful planning, you can pour it yourself. At Shovel Construction, we craft slabs for major commercial, industrial, institutional, aviation, and government projects across Miami-Dade and Broward counties, but here’s a DIY guide for pouring a shed slab that stands up to South Florida’s sandy soils and hurricanes.
First, select a location that complies with your local municipality’s property boundary setback requirements—typically 5–15 feet from property lines or structures in counties like Miami-Dade or Palm Beach. Always check with your local building authority for permitting requirements, as South Florida’s strict codes often mandate permits to ensure hurricane resistance.
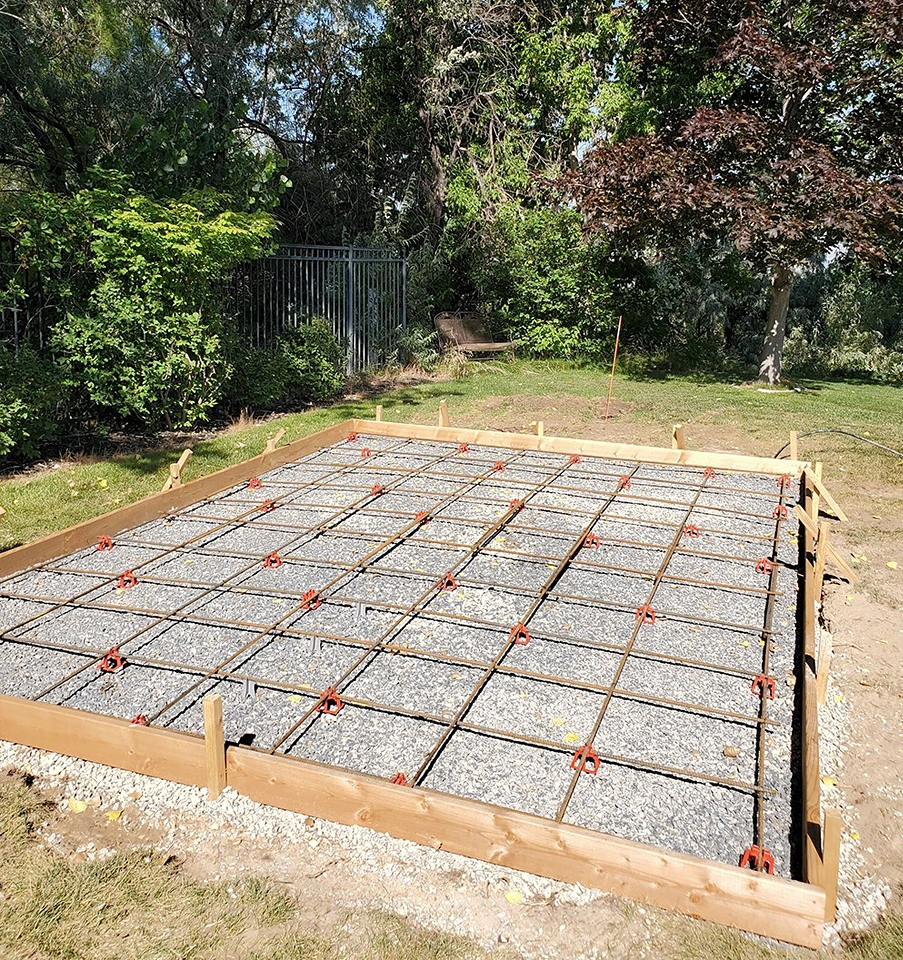
Prepare the site by clearing debris, grass, and roots, then level the ground. South Florida’s sandy soils need thorough compaction to prevent settling, so rent a plate compactor and add a 4–6-inch gravel layer for drainage, critical with our high water tables and heavy rains.
Calculate concrete needs using: (Length x Width x Height) ÷ 27 = cubic yards. For a 10’ x 10’ x 0.5’ (6-inch) slab, that’s (10 x 10 x 0.5) ÷ 27 = 1.85 cubic yards. A rule of thumb: one cubic yard requires 45–50 bags of 60-pound concrete mix, so you’ll need about 83–93 bags. Check bag instructions for exact yield due to water variations.
Build wooden formwork for a 4–6-inch-thick slab and add rebar or wire mesh for reinforcement, essential for hurricane durability. Pour 3,000–4,000 PSI concrete, level with a screed board, and apply a broom or troweled finish for slip resistance. Keep the slab moist for a week to cure properly in our humid climate.
Your shed slab will match the durability we bring to projects like Miami International Airport. At Shovel Construction, we share knowledge to empower our community, reflecting our “Solid Foundations… Solid Values…” ethos.